By Michael Deming
"A picture is worth a thousand words!” I’m sure just about everyone has heard this statement and if you have seen a really good photo, you understand what it means. With the invention of the cell phone camera, nearly everyone has a camera with them in the field and that’s the first step in getting good photos. If you don’t have the ability to snap a photo, you won’t have those memories in the future.
First off, let’s talk about the camera itself. Today’s phones will give you a picture that is good enough in quality to be able to have printed and put in a frame and look good. They are definitely fine for sharing your experiences on social media. Many people buy $1,500 phones for their cameras’ ability alone, which in my opinion is crazy. A great quality camera that has all the versatility and settings to get you photos in any situation as well as have a good flash will cost you half of that. Most have the ability to pair with your phone via blue tooth and share the photos. This is getting a bit on the techy side of things and that isn’t what we are going to cover in this article. I just want readers to know this option exists. Being able to adjust the exposure, aperture, shutter speed and other things that will get you great photos is achieved much better with a separate camera as opposed to your mobile phone.
Having your camera and putting it to use is the most important part of good field photos. If you take enough of them, you are going to get a few good ones even if only by accident. As you take more photos and share them with friends and family, you will start to see what gets noticed and this will make you better. Since we have been doing a publication and producing 25-30 shows per year for the past 15 years, we have made lots of mistakes and learned from them. This is an overview on how to capture your field experience through photos and get the most out of them.
 A good photographer can tell a story with all of their photos. You should be able to look though the photos you take on a hunting or fishing trip and do just that without ever giving someone an explanation. Setting up camp, cooking meals, sitting around the campfire, glassing from a lookout and various shots like this are things you will look back on years later and they will help you relive the entire trip. This is so much better than just having a few photos of your success. I don’t want to seem like trophy photos aren’t important. They are extremely important, but they aren’t the only thing.
Trophy photos are going to be the exclamation point on your trip. This is especially true when you are sharing them with other people who have like-minded interests. I want to share some of the tips and tricks I’ve learned over the years for getting the best trophy photos possible.
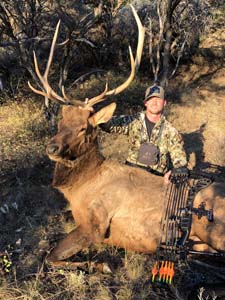
We want to provide a good representation of the animal and show it respect with these photos. This takes a great deal of work and effort to get good photos. This is especially true if you are talking about animals like elk or moose which are extremely large. You are going to have to make the most out of the situation and take photos where they lay.
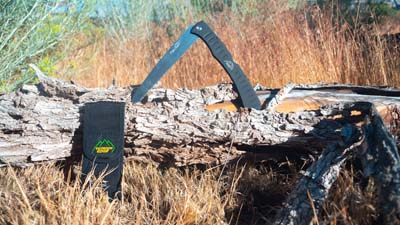 These are a few things that I take to the field with me to insure we do the best job possible on these photos. A small 7” folding saw made by Outdoor Edge is one of my favorite tools and I use it a bunch. I cut away all of the foliage and things that will get in the way of taking a good picture. I often wish I had a weed whacker, but it’s not feasible to pack one of those around. We usually end up pulling and cutting the long grass and bushes with a knife to make sure we have a clear shot for photos. Once you have a clear shot for the animal and hunter, you can now stage the animal. Rolling them onto their stomach as if they are laying down is a very natural position and great for photos if possible. A big Alaska/Yukon moose isn’t going to get moved to that position unless you have a lot of people, horses or a block and tackle. However, make the most of the situation. You are going to want to get the animal cleaned up and ready for photos. This means to either tuck the tongue back into the animals’ mouth or go ahead and cut it off like we do. Nothing distracts from a photo more than a bloody tongue hanging out of the animals’ mouth, especially when you share with a non-hunter.
Next, I always carry a package of wet wipes as well as a few dry rags in my pack. I make sure to get all of the blood off of the animals’ face, mouth and anywhere that will be part of the picture. The blood distracts from the animal in your photos and although it is part of what we do, there is no need to take photos that show us hunters as disrespectful to our trophy.
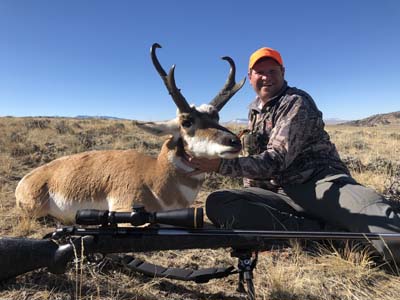
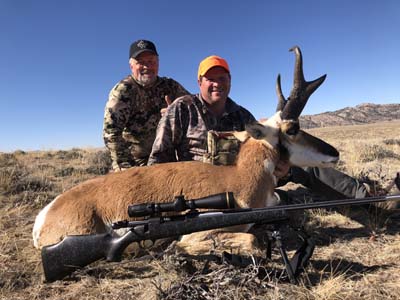
One extremely valuable lesson in taking trophy photos is that there is usually one pose or angle that will show this trophy to be as good as he can possibly be. All of the different antler configurations that grow make this pose different for each and every animal. This is a great place for your cell phone pics, as you can take numerous different angles to see what works best. Taking pictures from high, low, side, frontal, etc. are going to get you what you need. You will learn as you go and you will get much better with each and every outing.
 Here is another example of photos showing the same animal at different angles and poses. Many would think that these are two totally different animals. The Sportsman’s News team stays away from creative photography and forced perspective created by sitting 20 feet behind the animal to make them look bigger. We just use the different angles, lighting and what they grow to give them a final resting spot worthy of publishing.
